Welcome to my new series, Kid Vintage Craft! This series will be simple and quick projects that you can create with your children. All of the projects will be inspired by those published in magazines, books, and articles from the 1940s-early 1970s, including Family Circle, Better Homes and Gardens, and McCall's. Times were much more simple and schedules much less packed then, and homes, parties, and events often featured handmade invitations, table decor, and simple little crafts to fill time until dinner was served. Kid Vintage Craft will publish every Friday, just in time for the weekend! Enjoy, and I hope you will be inspired to create the projects with your kids as well!
Valentine's Day is coming soon, and the stores had their stock of hearts out before the Christmas clearance even started. Time flies so fast! Soon, classrooms will be trading Valentine cards and you and your friends will be hosting parties, so today we are
sharing instructions from 1949 for handmade Valentines for kids.
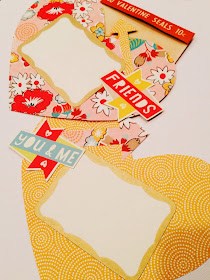
For the younger ones, ages 5-7, a red construction paper heart with Cupid's arrow and a simple message was cheerful and fun. We used patterned card stock and vintage gold Dennison labels. Cut your heart the old-fashioned way by folding construction paper in half, draw the pattern, and then use it to trace the others and cut. Then cut a freehand arrow from a coordinating paper and adhere (we used paper from our
Studio Calico kits).
For ages 8-10, a lace paper frame from a doily with an image of a pretty girl or cute boy from a catalog made Valentine's Day a little more exciting for the first childhood romance. We used Project Life cards and an image from a
Teen Vogue magazine. We added "Hello" letter stickers and then drew a word bubble. On the other, we added a puffy heart sticker from Twine + Ink from a
Studio Calico kit to the image from Teen Vogue pages. Don't the oversized sunglasses make cute wings? Kids love to cut things out of magazines and catalogs. Let them pick their favorites, like movie stars or famous musicians, and create your own set of unique Valentines! Katie is making 22 of these. Whew!
For ages 10-12, we used an A4 piece of letterpress paper as the main invitation. Place a Valentine heart seal in the top left corner, and a small red heart seal in the bottom right (we used vintage ones). Draw a border in the center of the card (or use a rubber stamp border or a sticker or Project Life card) to place the text inside. Place the sender's name in the lower left corner and the recipient's name near the heart if you are sending an invitation. You could also let your child doodle on the paper before adding stickers and seals. Katie's favorites are sparkle gel pens.
Remember to always hand deliver your Valentines (if possible) if you are following proper etiquette from yesteryear! We'd love to see your take on our Kid Vintage Crafts. Link us up in the comments or tag us on Instagram or Twitter @feedthebirdies.
See you next Friday for simple Valentine table decorations!
*
This project is inspired by Valentine party ideas in the book, The Complete Book of Children's Parties by Florence Hamsher, copyright 1949.


I LOVE YOUR BLOG
ReplyDelete